Lunch
Easy Homemade Hawaiian Spam Musubi
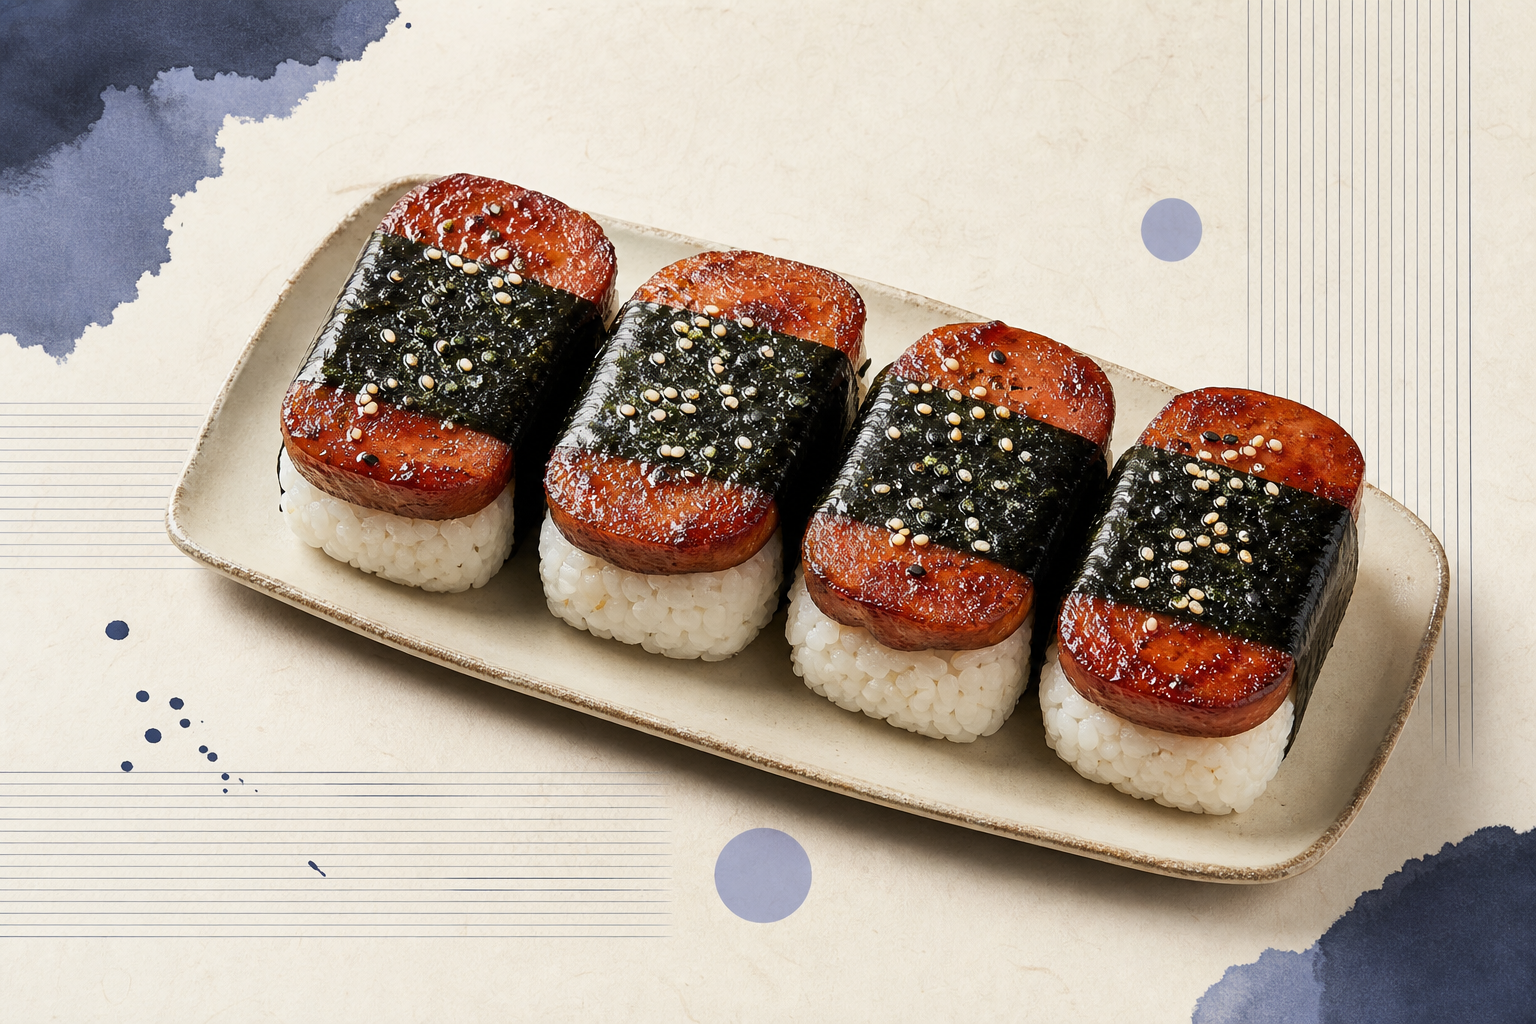
A practical home-kitchen musubi with warm seasoned rice, glossy sweet-savory luncheon meat, toasted sesame, and crisp nori. It works for lunch boxes, road snacks, game-day trays, and casual suppers with a bright side salad.
Introduction
This easy homemade Hawaiian Spam musubi is written for the home cook who wants the comfort of a warm rice snack without needing special restaurant equipment. The method is simple: season short-grain rice lightly, sear the luncheon meat until the edges caramelize, brush it with a quick sweet-savory glaze, then wrap everything in crisp nori.
Why this recipe works
- Lunch-box friendly and easy to portion.
- Uses grocery-store ingredients.
- Sweet-savory glaze adds big flavor with a short ingredient list.
- Works as a snack, appetizer, or casual supper.
About the ingredients
- Use classic Spam for the most familiar sweet-salty flavor, or choose reduced-sodium Spam if you prefer a lighter finish once the glaze is added.
- Short-grain sushi rice works best because it stays tender and sticky enough to hold its shape when pressed into the musubi mold.
- Nori sheets should be crisp and dry before wrapping; if they feel soft, briefly pass them over a warm burner or dry skillet to revive their texture.
Tips
- Use short-grain rice, not long-grain rice, because it holds its shape better.
- Keep a small bowl of water nearby and dampen your fingers or mold to prevent sticking.
- Do not over-reduce the glaze; sugary soy mixtures can turn bitter if scorched.
- For a neater lunch-box musubi, wrap each piece tightly in parchment after assembly.
- If the nori tears, the rice may be too hot or too wet; let it cool for a few minutes before wrapping.
Substitutions
- Use tamari instead of soy sauce if you need a gluten-free option, checking every label carefully.
- Use water instead of pineapple juice for a less fruity glaze.
- Add a thin strip of cooked egg between the rice and glazed slice for a fuller lunch.
- Sprinkle furikake over the rice before wrapping for extra savory flavor.
Serving suggestions
- Serve with cucumber salad, pineapple wedges, edamame, miso soup, or cabbage slaw.
- Pack each musubi in parchment for lunch boxes.
- Cut in half for a party tray so the rice and filling are visible.
Storage & reheating
Storage: Musubi is best the day it is made, while the rice is soft and the nori still has structure. Store leftovers tightly wrapped in the refrigerator for up to 2 days. The nori will soften after refrigeration, which is normal.
Reheating: Remove any plastic wrap, cover with a barely damp paper towel, and microwave in 15-second bursts until just warm. Do not overheat or the rice can become tough.
Mistakes to avoid
- Using long-grain rice, which does not hold together as reliably.
- Pressing the rice so firmly that the musubi becomes dense.
- Letting the glaze boil hard after the sugar is added.
- Wrapping with rice that is steaming hot and wet enough to tear the nori.
FAQ
Can I make musubi without a mold?
Yes. Line the empty luncheon meat can with plastic wrap, add rice, press gently, and lift it out with the wrap. You can also shape the rice by hand with damp fingers.
Can I serve musubi cold?
You can, but the texture is best warm or at room temperature. Cold rice becomes firm, so let refrigerated musubi sit out briefly or warm it gently before eating.
What side dishes go well with it?
Cucumber salad, pineapple wedges, edamame, miso soup, or a simple cabbage slaw all balance the salty-sweet glaze.
Recipe card
Easy Homemade Hawaiian Spam Musubi
A practical home-kitchen musubi with warm seasoned rice, glossy sweet-savory luncheon meat, toasted sesame, and crisp nori. It works for lunch boxes, road snacks, game-day trays, and casual suppers with a bright side salad.
- Prep
- 25 minutes
- Cook
- 20 minutes
- Total
- 45 minutes
- Servings
- 8 musubi
Equipment
- rice cooker or heavy pot with lid
- small mixing bowl
- large skillet
- cutting board
- sharp knife
- musubi mold or cleaned luncheon meat can
- plastic wrap
- spatula
Ingredients
Rice
- 2 cups uncooked short-grain white rice , rinsed until the water runs mostly clear
- 2 1/4 cups water
- 2 tablespoons rice vinegar
- 1 teaspoon granulated sugar
- 1/2 teaspoon fine sea salt
Glazed luncheon meat
- 1 can luncheon meat , sliced into 8 even pieces
- 2 tablespoons low-sodium soy sauce
- 1 tablespoon brown sugar
- 1 tablespoon pineapple juice or water
- 1 teaspoon toasted sesame oil
- 2 teaspoons neutral oil , for searing
Assembly
- 4 full sheets nori , cut in half crosswise
- 1 tablespoon toasted sesame seeds
- 1 cup thin cucumber sticks , optional, for serving
Instructions
- Cook the rice. Combine rinsed rice and water in a rice cooker or a small heavy pot. Cook according to your rice cooker setting, or bring to a simmer, cover, reduce heat to low, and cook for about 18 minutes. Let the rice rest, covered, for 10 minutes before fluffing.
- Season the rice while it is warm. Stir together rice vinegar, sugar, and salt until dissolved, then fold the mixture gently into the rice. Keep the rice covered with a clean towel so it stays warm and pliable.
- Make the glaze. In a small bowl, whisk soy sauce, brown sugar, pineapple juice or water, and sesame oil until the sugar begins to dissolve.
- Sear the luncheon meat. Heat neutral oil in a skillet over medium heat. Add the slices in a single layer and cook 2 to 3 minutes per side, until browned at the edges.
- Glaze the slices. Reduce heat to low, pour the glaze into the skillet, and turn the slices until glossy. Cook 30 to 60 seconds, just until the glaze clings; do not let it burn.
- Prepare a shaping station. Place a half sheet of nori shiny side down on a board. Set a musubi mold in the center if you have one, or use the cleaned luncheon meat can lined with plastic wrap as a mold.
- Shape the rice. Add about 1/3 cup warm rice to the mold and press gently into an even rectangle. Avoid smashing it too firmly; compact enough to hold is the goal.
- Add the glazed slice. Place one piece of glazed luncheon meat on the rice, sprinkle with sesame seeds, and press lightly.
- Wrap the musubi. Remove the mold, fold the nori around the rice and filling, and seal the edge with a few grains of rice or a dab of water. Repeat with remaining ingredients.
- Serve soon. Let the wrapped musubi sit seam-side down for 2 minutes so the nori relaxes, then serve warm or at room temperature.
Notes
- Use short-grain rice, not long-grain rice, because it holds its shape better.
- Keep a small bowl of water nearby and dampen your fingers or mold to prevent sticking.
- Do not over-reduce the glaze; sugary soy mixtures can turn bitter if scorched.
- For a neater lunch-box musubi, wrap each piece tightly in parchment after assembly.
- If the nori tears, the rice may be too hot or too wet; let it cool for a few minutes before wrapping.
Nutrition
Nutrition estimate unavailable.